NVM and Visual Studio Code
How to use the Node Version manager (NVM) with the Visual Studio Code (VS Code) editor
How to use NVM and VS Code together
UPDATE January 2018 - NVM and VS Code now play nicely together - this post is maintained as historical reference
If you want to skip straight to the working code, see it on Github:
NVM is a great way to manage your Node.js versions. Visual Studio Code (VS Code) is a great lightweight editor that is quickly becoming the de facto standard in Javascript/Typescript development. However, NVM and VS Code don’t play super nicely together out of the box. Here’s a way to get them to work together, adapted from an answer on the VS Code Github issues page.
Why manage your Node.js Versions?
You may have one project that is meant to be deployed to an environment running Node 4.3 and another set of code that’s meant to be deployed to an environment using Node 6.10. To reduce the risk of errors (“it works on my machine, why isn’t it working when I deploy it?!?!”), use the same Node version locally that you will on the server. But how do you run one version of Node in one directory, and another version in yet another directory?
That’s what NVM allows you to do.
How to get NVM and Visual Studio Code (VS Code) working together
Install NVM. It will probably place some lines in your ~/.bashrc which will be executed every time you load a shell that will load the nvm script into your shell. You could also specify for it to install into your ~/.bash_profile.
Put a file into the root of your project called .nvmrc:
6.10
That’s it, that’s the whole .nvmrc format - just put inside the version of Node that you want.
Drop another file into the root of your project called node.sh:
#!/bin/bash
source ~/.bashrc # or ~/.bash_profile if that's what you use
nvm run $*
This shell script sources ~/.bashrc/~/.bash_profile, then uses nvm to execute the appropriate version of Node (that it finds in .nvmrc) on whatever command you pass in. You may have to run chmod +x ./node.sh in order to give the shell script execute permissions.
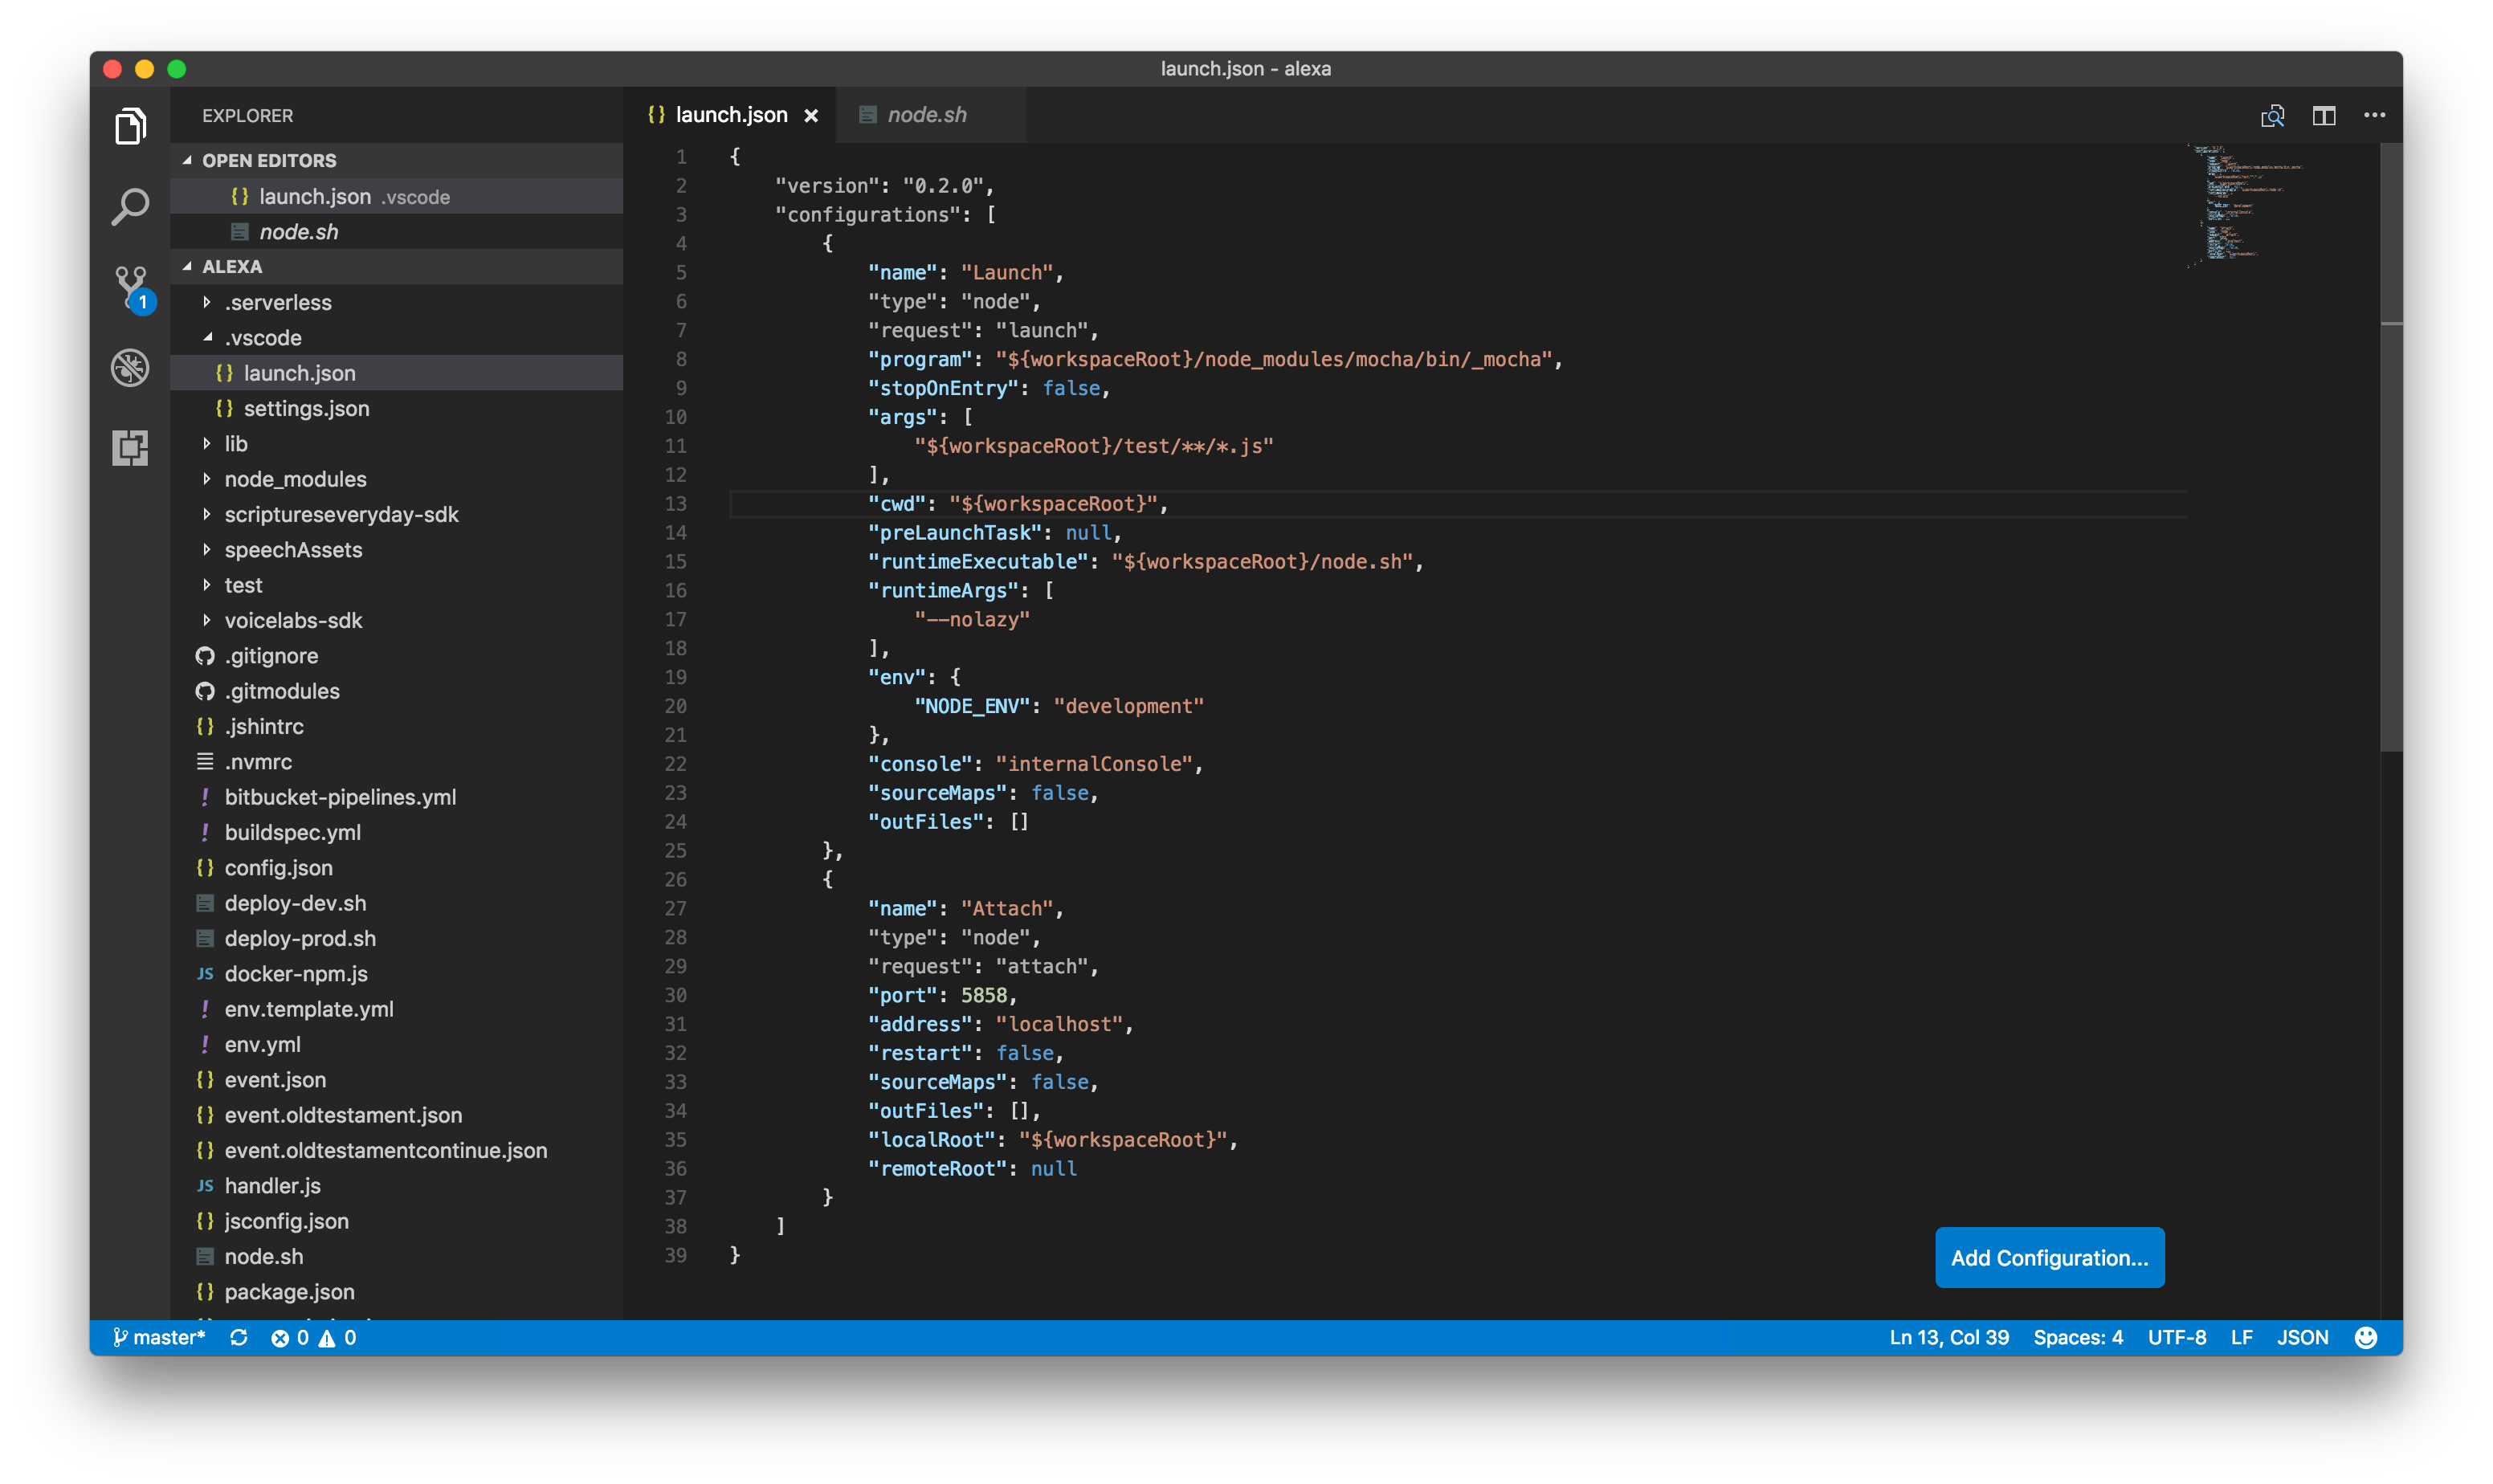
In Visual Studio Code (VS Code), make sure you’ve created a launch.json. Then, in whichever launch task you are going to be running Node.js, just set the runtimeExecutable property:
{
    "version": "0.2.0",
    "configurations": [
        {
            "type": "node",
            "request": "launch",
            "name": "Launch Program",
            "program": "${workspaceRoot}/index.js",
            "runtimeExecutable": "${workspaceRoot}/node.sh"
        }
    ]
}
Now, when you click “Play” or press F5, you’ll run whichever version of Node you’ve specified in the .nvmrc file.
See the complete working code on Github:
What other tips do you have for debugging Node.js apps in VS Code? Leave your answer in the comments!

Share this post
Twitter
Facebook
Reddit
LinkedIn
StumbleUpon
Email